
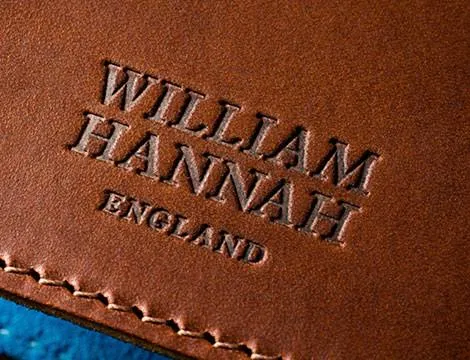
Leather goods need a finish that looks neat and lasts well. A small logo can change the look of a wallet, bag, belt, or notebook. Leather foil stamping adds color and detail to these items with heat and pressure. It can give a plain surface a rich look without adding bulky parts. The right tools matter, of course. Good results depend on the leather type, the design, the heat level, and the foil used. A little care at each step helps create a clean mark.
Why Leather Needs A Clean Finish
Leather has its own grain, feel, and texture. This makes each item a little different. A logo that looks sharp on one hide may not look the same on another. The surface may be smooth, rough, soft, or coated. Each type needs the right method. A test on a spare piece can save time and reduce waste. It also helps show how much heat and pressure the leather can take. Keep the design clear and avoid tiny details that may not transfer well.
How Heat Creates Lasting Marks
Foil stamping uses a heated die to press a design onto a surface. The heat helps the foil bond to the material, while pressure gives the mark its shape. The process sounds simple, but small changes can affect the result. Too much heat may damage the leather. Too little may leave gaps in the design. The right pressure helps keep lines even and clear. A steady setup also makes repeat jobs easier. For best results, test the die, foil, and leather as one set before making the full batch.
Choosing Foil For Leather Goods
The right stamping foil can change the look of a leather item. Gold and silver are common choices for logos, while other shades suit bold or simple designs. Foil must also work with the leather finish and the heat used by the press. A foil that bonds well to one surface may fail on another. Check the maker’s guide before use and test a small area first. This step helps spot poor transfer, dull color, or peeling. A good match gives the logo a neat look and helps reduce wasted stock.
Matching Dies To Your Design
A die carries the shape of the logo or text onto the leather. Brass dies are often used for fine detail and repeat work. The best choice depends on the design, order size, and press. Thin lines and small letters need close care. Very fine details may fill in or fail to show on a rough surface. Share clear artwork with the die maker and check the size before work starts. Metallic Elephant offers custom hot foil dies and related products. You can learn more at metallicelephant.co.uk before choosing parts for your job.
Testing Before Full Production Starts
A short test run can prevent costly errors. Use a spare piece of the same leather, then check the color, edge detail, and bond. Look at the mark from more than one angle. Does it look clean? Are any parts missing? Does the foil lift when rubbed? These checks help show what needs to change. Adjust one setting at a time so the cause is clear. Keep a note of the heat, pressure, and timing that work well. This record can help when the same job returns.
Care Tips For Better Results
Clean tools help keep each mark sharp. Remove old foil and dirt from the die when the machine is cool and safe to handle. Store foil away from dust, heat, and damp air. Keep leather flat and free from oils before stamping. Even small bits of dirt can leave marks on the finish. Check the press often and follow the maker’s care guide. If the result changes from one run to the next, pause and inspect the setup. A few simple checks can protect both the material and the final look.
Conclusion
A good leather finish starts with the right plan. Choose a design that suits the grain, test the heat and pressure, and use foil made for the surface. Careful setup helps logos look clean and keeps waste low. Each leather type may need a small change, so testing is worth the time. For dies, foil, and press advice, metallicelephant.co.uk can be a useful place to start. With the right tools and a steady process, plain leather goods can gain a clear, smart finish that suits the brand.