


What Is a Motor Capacitor?
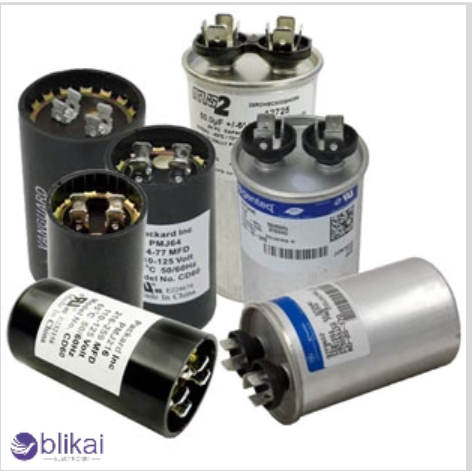
A motor capacitor is one of the most important electric entities to facilitate the working of electric motors. It basically stores and releases electric energy such that a phase shift is introduced to the motor’s windings. This phase shift essentially produces a rotating magnetic field that allows for efficient motor operation.
Types of Motor Capacitors
- Start capacitors: These provide a high initial torque during motor startup.
- Run capacitors remain in the circuit during regular operation, improving motor efficiency.
How Motor Capacitors Work
Motor capacitors store and release electrical energy and create a phase shift in the main and auxiliary windings of single-phase motors. This creates a rotating magnetic field, enabling the motor to start and run efficiently.
Preparing for Capacitor Testing
Safety precautions
Safety must be paramount before testing motor capacitors. Always turn off the motor and let it sit for 30 minutes so the capacitors can slowly discharge. Wear insulated gloves and safety goggles to protect from any projected discharges. Bare-hand contacts with the capacitor terminals are not recommended because a charge can still lurk there and give a nasty shock.
Required tools and equipment
Some tools are needed to facilitate the testing of the motor capacitor. The digital multimeter is the most common tool used for this purpose. Make sure that it has a capacitance measuring function. You may also need insulated pliers to handle the capacitor safely and a screwdriver to access the interior of the motor. If the meter is analog, make sure it is set correctly to show accurate readings.
Locating the capacitor in your motor
Next, you will need to identify the location of the capacitor in your motor. In most cases, capacitors are found in a separate container or attached externally to the motor’s body. Look for a cylindrical component, usually encased in a metal or plastic housing, often adjacent to the motor’s terminals or start switch. If the location is still unclear, check the user manual or schematic diagram of the motor to assist you in locating it.
Visual Inspection
Checking for physical damage
When checking motor capacitors, it is best to start by looking for noticeable physical damage. Inspect the capacitor casing for cracks, dips, or punctures; all indicate internal failure and eventual breakdown. Pay extra attention to the terminals and connectors if they are loose, corroded, or bent.
Identifying bulging or leaking
The capacitor may be on its last legs if you see physical distortion or signs of leaking. You should watch for swelling or distortion in the shape of the capacitor, particularly at the top. However, a suitable capacitor should remain in its original shape. If you notice any oily substance or moisture around the capacitor, it is most likely leaking electrolyte, which means it has failed and must be replaced immediately.
Assessing discoloration
Discoloration can be another sign of trouble with a capacitor. Look on the surface of the capacitor for unusual color variations like browning or blackening. These disfigurements are usually due to overheating or voltage stress. A unique watch must be kept for discoloration around the terminals since this is where most heat-induced coloration starts. Any discoloration means the capacitor was subjected to conditioning beyond its operational specifications.
Multimeter Testing Method
Setting up the multimeter
A few steps must be followed while testing the motor capacitor with a multimeter. Get a digital multimeter with a capacitance setting and set it on that setting. The multimeter setting is often signified by the symbol “F,” standing for Farad. Choose a range corresponding to a reasonably expected value of the capacitor you’ll be measuring.
Measuring capacitance
Disconnect the capacitor from the motor circuit and discharge it safely. Connect the multimeter probes to the terminals of the capacitor, taking care to observe polarity if it is a polarized capacitor. Wait until the reading settles down; a few seconds should suffice.
Interpreting the results
The measured value is now compared to the capacitor’s rated value, which is generally printed on its casing. For the capacitor to be suitable, the estimated value should be within 10% of the rated value. If there’s a significant difference in readings between what is printed on the casing and the measured value or reads “OL,” the capacitor may be faulty.
Troubleshooting common issues
If your readings are too erratic, ensure that the battery of the meter is good and once again check that both probes maintain contact with the terminals of the capacitor. Very low or no readings can indicate that the capacitor is shorting. A resistor can be opened when the multimeter doesn’t read anything. Either way, replacement is probably necessary.