
A rapid tooling service delivers injection molds in days to weeks, and an overmolding service bonds a soft grip layer onto rigid plastic parts.
A product team can lose two months waiting on a steel mold, then find out the finished housing feels slick in the hand. Two services solve those problems from different ends. A rapid tooling service shortens the wait for molds, and an overmolding service adds soft, grippy, or sealing layers to a rigid part. This guide explains how each works, where they fit, and why pairing them early saves money.
What Is a Rapid Tooling Service?
A rapid tooling service builds injection molds quickly, usually from aluminum or soft steel, using CNC machining, EDM, or 3D-printed tooling. You get real parts in the real production resin without waiting for full hard tooling.
How Fast Is Rapid Tooling Compared With Conventional Molds?
Conventional tooling can take up to about eight weeks. Rapid tooling typically cuts that to days or a few weeks, depending on part complexity and the supplier. Aluminum is a big reason: it machines five to ten times faster than steel, and it wears cutting tools less. Treat any single quoted lead time as a range, since suppliers define “rapid” differently.
Aluminum, Steel, or Printed Molds?
Each option fits a different stage.
- 3D-printed molds: Good for a few hundred shots when you only need functional samples. Cheapest and quickest, but short-lived.
- Aluminum molds: The usual pick for bridge production, where thousands of parts are needed before production tooling is ready.
- Soft or pre-hardened steel (such as P-20): Better when volumes climb. One mold maker cited a four-cavity P-20 mold at roughly $15,000 versus $5,000 for a single-cavity aluminum mold, which shows how cavity count, not just metal choice, drives price.
The trade-off is honest and unavoidable: faster and cheaper tools tend to give up some tool life or tolerance. Abrasive glass-filled resins will chew through aluminum faster than unfilled grades.
When Does Rapid Tooling Make Sense?
It earns its cost in four situations:
- Validating a design with molded parts before committing to expensive production tooling
- Bridging the gap while hardened production molds are built
- Running short market tests or pilot batches
- Iterating quickly when the design is still changing
It’s a poor fit once the design is frozen and you need millions of parts. At that scale, a hardened steel mold pays for itself.
What Is an Overmolding Service?
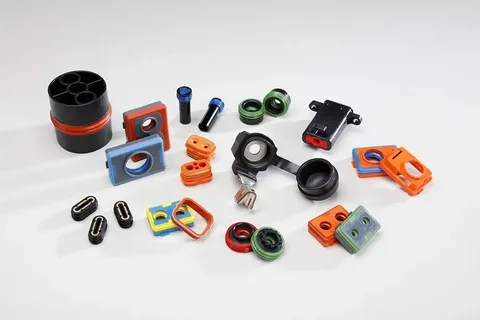
An overmolding service molds a second material, most often a thermoplastic elastomer (TPE) or TPU, over a rigid plastic substrate such as ABS, PC, or nylon. The result is a single part with a hard structure and a soft surface: toothbrush handles, power tool grips, wearable device seals.
Don’t confuse it with insert molding, which places plastic around a non-plastic component, usually metal. Overmolding can run two ways. In multi-shot molding, the substrate stays in the tool and the soft material is injected in a second step. In the other approach, the finished substrate moves to a separate mold for the second shot.
Why Does Bond Strength Decide Everything?
Because a weak bond means delamination, and delamination in the field is a product failure. Two mechanisms hold the layers together: chemical adhesion and mechanical interlocking.
Chemical adhesion depends on material pairing. ABS bonds well with many TPE and TPU grades. PC bonds with TPE and TPU. Polypropylene is harder: it’s a low-energy surface, so you need a TPE based on PP chemistry, or you fall back on mechanical locks or a primer. Nylon works with TPE grades formulated for it.
Which Design Rules Prevent Overmold Failure?
Design for the bond on the CAD screen, not after the first bad sample.
- Keep wall thickness uniform in both the substrate and the overmold.
- Add mechanical interlocks such as through-holes, grooves, and undercuts so the elastomer can lock in.
- Gate away from the interface. Injecting straight at the substrate surface can wash it out before bonding starts.
- Dry the materials. Moisture damages adhesion; a common TPU/TPE guideline is two to four hours at 80 to 100°C, but follow the supplier’s datasheet.
- Vent and shut off properly so trapped air doesn’t leave a pocket at the interface.
How Do Rapid Tooling and Overmolding Work Together?
Overmolding doubles the tooling work, because you need a mold for the substrate and another cavity or mold for the overmold. It also hides its biggest risk: you won’t know whether the bond holds until both shots are molded and tested.
That’s where aluminum tooling shines. Cutting an aluminum tool to test two or three TPE grades costs far less than reworking hardened steel, and a failed pull test teaches you something before production money is spent. My recommendation: run overmolded designs through a rapid tooling stage first, then move to steel once the material pair and gate location are proven. Skip that stage only if you’re repeating a proven combination.
What Should You Ask a Supplier?
- Which substrate and overmold pairings have they bonded successfully before?
- Do they offer both services under one roof, or will your part move between vendors?
- What tool life is guaranteed, and for which resins?
- Will they review your CAD for wall thickness, gating, and interlocks before cutting metal?
- How do they test bond strength?
[link to related post on design for manufacturability in injection molding]
Conclusion
A rapid tooling service gets you molded parts fast enough to learn from them, and an overmolding service turns a plain rigid part into one that feels and performs like a finished product. Together they let you find bonding problems while changes are still cheap. If your next part needs both, start with a design review and an aluminum prototype tool, then scale once the numbers hold.