


The first hour after landing in the United States is when you need data most. You want to message family, order a ride, check the hotel address, and maybe pull up a boarding pass for a connecting flight. Standing in a crowded arrivals hall hunting for free WiFi, or waiting in line at an airport phone shop, is not how anyone wants to start a trip.
International visitors from Europe, Asia, and Latin America increasingly solve this by installing an eSIM before they leave home. The process is simple once you know the order of steps, but a few small mistakes can leave you without service at the worst moment. Installing too late, forgetting to enable roaming on the right line, or using a carrier-locked phone are the usual culprits.
This guide follows the timeline of a typical trip, from checking your phone a week before departure to troubleshooting in the first hour after touchdown. Follow it and you should walk out of the terminal already connected.
Why a Digital SIM Beats the Airport Kiosk
Airport kiosks and convenience-store SIM cards are familiar options, but they come with friction. Lines can be long after international arrivals, opening hours vary, and choices are often limited to whatever the kiosk stocks. You also have to remove your home SIM, keep it safe, and hope the new card activates properly.
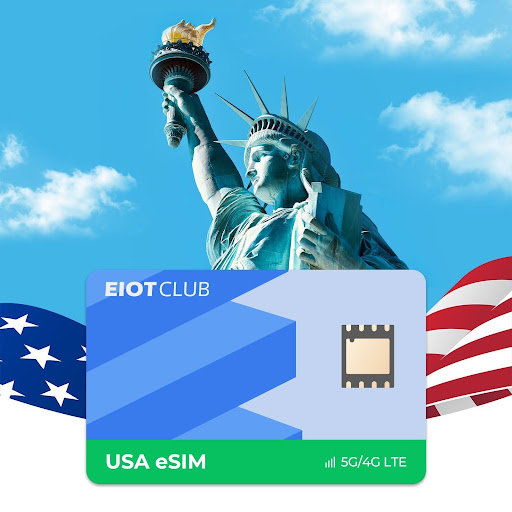
A USA travel eSIM moves all of that to the comfort of your home. You purchase the plan online, receive a QR code, and install the profile over WiFi. Because the eSIM lives digitally in your phone, your home SIM stays where it is. That means you keep receiving texts from your bank or two-factor authentication codes while using the eSIM for local data.
The other advantage is predictability. You know the plan length and data allowance before you travel, so there are no roaming bills waiting for you when you return home. For visitors on short trips, conferences, or multi-city holidays across the US, that clarity is a big part of the appeal.
A Week Before You Fly: Check Your Phone
Two quick checks now will save you from discovering a problem at the airport, when there is no time left to fix it.
Confirm eSIM Support
Most recent flagship phones support eSIM, including iPhone models from the XS and XR onward, Google Pixel phones from the Pixel 3 onward, and many recent Samsung Galaxy devices. Some regional versions, including many phones sold in mainland China, use dual physical SIM slots instead. On an iPhone, open Settings, then General, then About, and look for an EID number. On most Android phones, dialing *#06# displays the EID if the device supports eSIM. No EID usually means no eSIM.
Make Sure the Phone Is Unlocked
A carrier-locked phone will reject eSIM profiles from other providers. If you bought your phone on contract or through a carrier promotion, it may still be locked. On an iPhone, go to Settings, General, About, and look for Carrier Lock. It should read “No SIM restrictions.” On Android, the check varies by manufacturer, but contacting your carrier is the most reliable option. Unlock requests can take several days, so handle this well before departure.
Estimate How Much Data Your Trip Needs
Picking a plan size is easier when you think about how you actually use your phone abroad. Navigation apps, ride-hailing, and messaging use modest amounts of data, while video calls, social media video, and streaming music can add up quickly. A traveler who mainly uses maps and messaging on a short city break needs far less than someone joining daily work calls or sharing a hotspot with a laptop. Look at your phone’s cellular usage screen at home to see a typical week, then adjust for the trip. Downloading offline maps, playlists, and entertainment before you leave reduces what you need once you arrive. It is usually better to choose a plan that can be topped up than to guess high and leave data unused when the trip ends.
The Night Before: Install and Label the eSIM
Installation needs a stable internet connection, which is why doing it at home makes sense. The QR code has to be scanned by the phone that will use the eSIM, so display it on a laptop or print it rather than trying to scan it from the same screen. Most providers also offer manual entry details if scanning is inconvenient.
The general sequence looks like this:
- On iPhone, open Settings, tap Cellular or Mobile Data, and choose Add eSIM. On Android, open Settings, go to Connections or Network and Internet, and select SIM manager.
- Scan the QR code or enter the activation details manually.
- Give the new line a clear label such as “US Travel” so it is easy to identify.
- Keep your home line as the default for calls and texts, and leave the eSIM line off for now.
Do not delete the eSIM after installing it. Many profiles can only be installed once, and removing one may mean contacting support for a replacement. Save a screenshot of the provider’s APN and setup instructions in your photos so you can view them offline.
On Arrival: Switch Data Lines the Right Way
Once the plane lands and you are allowed to use your phone, turn off airplane mode and head into your cellular settings. Switch the eSIM line on and set it as the line for mobile data. Then enable data roaming on the eSIM line. This step confuses many travelers, because the eSIM connects to a US partner network that your phone treats as roaming, even though the plan is designed for the United States.
Just as important, make sure data roaming is turned off for your home SIM. If both lines have roaming enabled, your phone may pull data through your home carrier and trigger charges. On iPhones, you can also turn off Allow Cellular Data Switching to stop the phone from swapping lines when the signal dips.
Within a minute or two, you should see a US network name and signal bars for the eSIM line. Open a map or messaging app to confirm data is flowing. If you plan to share the connection with a laptop, test the personal hotspot now, while you still have airport WiFi as a backup.
Before you leave the terminal, take a moment to adjust a few phone settings for the trip. Turn on low data mode for the eSIM line if your phone offers it, which reduces background activity from apps you are not using. Disable automatic photo backups over cellular so holiday pictures upload later on hotel WiFi instead. If you are on a connecting domestic flight, keep the eSIM enabled so it reconnects automatically when you land at your next airport. These small changes help your data allowance last for the whole visit rather than running low halfway through.
Troubleshooting Common First-Hour Problems
If you see signal bars but pages will not load, check the APN first. Some eSIMs set it automatically, while others need you to enter it under the line’s Mobile Data Network settings. Compare it with the screenshot you saved before departure.
If there is no signal at all, restart the phone and toggle airplane mode. Terminals with thick concrete walls can have weak reception, so walking toward a window or the exit sometimes solves the problem on its own. Confirm that the eSIM line is actually enabled, since some phones switch it off after a restart.
When data works but feels slow, check whether your phone has connected to a secondary network. Selecting the network manually in the carrier settings can help. If none of these steps work, contact your provider’s support team over airport WiFi. Eiotclub, for example, includes installation guidance and support contact details with its orders, which makes it easier to resolve issues quickly before you leave the airport.
Landing Connected in the United States
Setting up an eSIM for a US trip is less about technical skill and more about timing. Check compatibility and unlock status a week ahead, install and label the profile the night before on home WiFi, and switch lines only after you land. Enabling roaming on the eSIM while keeping it off for your home SIM prevents most of the surprises travelers run into.
Keep a screenshot of your setup instructions handy, and know the quick fixes for the first hour: check the APN, toggle airplane mode, and move closer to a window if the signal is weak. These small habits turn a potentially stressful arrival into a smooth one.
With data working before you reach baggage claim, you can call a ride, share your location with family, and head to your hotel without searching for WiFi. That simple head start sets the tone for the rest of the trip.