
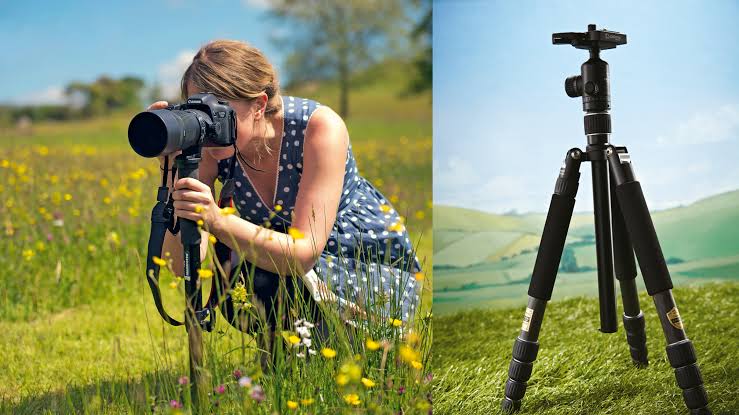
Most photographers buy their first tripod for one reason: blurry photos. A long exposure smeared by shaky hands, a group shot that came out soft, a sunset that looked sharp on the screen but fell apart on the computer. A tripod fixes those problems, but only if it suits how and where you actually shoot. The wrong one ends up in a closet because it is too heavy to carry, too slow to set up, or too wobbly to trust.
Choosing well has less to do with chasing the tallest or most expensive model and more to do with matching support to your habits. A landscape shooter who hikes before dawn needs something different from a portrait photographer working in a living room or a traveler who wants a tripod that disappears into a daypack. This guide walks through the decisions that matter, from stability and head design to flexible legs and setup technique, so you can pick camera support that you will reach for every time you head out.
Start With What You Actually Shoot
Before comparing leg designs or materials, write down the three situations where you most often wish you had a steadier camera. That short list tells you more than any spec sheet. Browsing a focused range of Camera Tripods becomes much easier once you know whether you need reach, portability, or the ability to mount on things that are not flat ground.
Landscapes and Long Exposures
If you photograph waterfalls, city lights, or star trails, your camera may sit still for seconds or minutes. Any vibration from wind or a soft surface shows up as blur. Here, rigidity is the top priority. Look for legs that lock firmly, a center column you can avoid extending, and feet that grip rock and wet ground. Height matters less than you think, since many strong landscape compositions come from lower angles anyway.
Portraits, Products, and Indoor Work
Indoors, you usually have a flat floor and time to set up. What you need is repeatability. When you shoot a series of product photos or headshots, you want the camera to stay in exactly the same spot so lighting and framing stay consistent. A tripod with smooth, precise adjustments helps you make tiny framing changes without starting over.
Travel and Everyday Carry
For travel, the best tripod is the one you are willing to bring. Compact designs that fold small or wrap around a railing often beat full-size models simply because they leave the hotel with you. Accept a little less height in exchange for a tripod that fits in a bag side pocket.
Stability Factors That Matter More Than Height
Height is the number most people fixate on, yet it is rarely what separates a sharp photo from a soft one. Stability comes from how the tripod handles the weight and balance of your camera and lens. A heavy telephoto lens pulls the center of gravity forward, which can make a lightweight tripod tip or sway. Check that the support you choose is rated comfortably above the combined weight of your heaviest body and lens, leaving room for accessories like a microphone or small light.
Leg angle and spread also play a role. Wider stances resist tipping, and legs that can splay independently let you level the camera on stairs, slopes, or uneven rocks. The center column is convenient, but raising it turns a stable triangle into a single thin pole. Extend the legs first and treat the column as a last resort. Finally, pay attention to the feet. Rubber feet suit indoor floors and pavement, while textured or grippy feet hold better on dirt and damp surfaces.
Choosing a Head: Ball Head or Pan-and-Tilt
The head is where your hands spend most of their time, so it shapes how pleasant the tripod feels to use. A ball head lets you move the camera freely in any direction and lock it with a single knob. It is fast and compact, which makes it popular with travel and street photographers who reframe often.
A pan-and-tilt head separates movements into individual axes. It takes a moment longer to adjust, but it gives you precise control, which helps with architecture, panoramas, and product shots where a slight tilt ruins straight lines. Video shooters often prefer heads with smooth panning so camera moves look controlled rather than jerky. Whichever style you choose, make sure the head has a quick-release plate. Being able to snap the camera on and off saves time and makes it far more likely you will actually use the tripod instead of shooting handheld out of impatience.
Flexible Legs and Unconventional Mounting
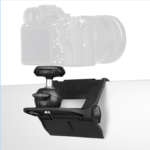
Traditional tripods assume a flat surface. Real life rarely offers one. Fence posts, tree branches, railings, car headrests, and café tables are often the best vantage points you have. Flexible-leg tripods, such as the wrappable designs JOBY is known for, let you grip irregular objects and position the camera where a standard tripod simply cannot stand.
This flexibility opens creative options. You can wrap the legs around a branch to shoot a stream from above, attach the camera to a railing for a clean timelapse of a busy street, or bend the legs to level the camera on a pile of rocks. When using wrap-around legs, test the grip before letting go. Give the setup a gentle shake, confirm the camera holds its angle, and keep a hand nearby for the first few seconds, especially over water or a long drop.
A Setup Routine for Sharper Photos
Even a well-chosen tripod can produce soft images if the setup is rushed. A consistent routine removes guesswork and quickly becomes second nature. Here is a sequence that works in most conditions:
- Spread the legs fully and plant them on the firmest ground available before extending any sections.
- Extend the thickest leg sections first, leaving the thinnest ones for fine height adjustment.
- Level the base by adjusting leg lengths, then attach the camera with the quick-release plate.
- Point one leg toward your subject so you can stand between the other two without kicking them.
- Turn off lens stabilization if your camera maker recommends it for tripod use.
- Use a self-timer or remote shutter so pressing the button does not shake the camera.
In windy conditions, lower the tripod and hang your bag from the center hook if one is available. The added weight dampens vibration. On soft sand or snow, push the feet down firmly and wait a moment for the tripod to settle before taking your shot.
When One Tripod Is Not Enough
Many photographers eventually find that a single tripod cannot cover everything they shoot. A sturdy full-size model handles planned landscape sessions and studio work, while a compact or flexible option comes along on hikes, city walks, and family trips. Rather than looking for one design that does it all, think of your tripods as a small system. The larger one delivers maximum rigidity when you have time to set up. The smaller one covers spontaneous moments and awkward locations.
If you are just starting out, begin with the tripod that suits your most frequent situation. Add a second one only when you notice a clear gap, such as missing shots on trips because your main tripod stays home. Building your kit this way keeps it lean, avoids buying gear you rarely use, and ensures every piece earns its place in your bag.
Caring for Your Tripod So It Lasts
A tripod that is looked after stays tight and reliable for years. After shooting at the beach, rinse the legs with fresh water and dry them fully, since salt and sand work their way into locks and joints. Extend all sections once in a while and wipe them down so grit does not scratch the surfaces. If a leg lock or head starts to slip, check the tension adjustment before assuming anything is broken. Many issues come from loosened screws that only need a small turn. Store the tripod with the locks released to reduce long-term stress on the mechanisms, and keep the quick-release plate attached to your camera so you never leave it behind on a trip.
Finding the Tripod That Fits Your Workflow
The right tripod is not about impressive numbers. It is about matching support to the pictures you take most often. Start by identifying your common shooting situations, then prioritize stability over height, choose a head that suits the way you frame, and consider flexible legs if you regularly shoot where flat ground is scarce. Pair that choice with a simple setup routine and basic maintenance, and your tripod turns from something you own into something you use.
A good tripod also changes how you shoot. It slows you down just enough to think about composition, lets you try long exposures and low-light scenes you would otherwise skip, and gives you consistent results across a series of images. Take the time to choose support that suits your style, and you will see the difference in every sharp frame you bring home.