


Whether you are staging a property for a real estate listing, filming short-form social media videos, or capturing memories from a weekend gathering, taking great photos of your outdoor space is harder than it looks.
You might stand on your back porch, look out at a gorgeous yard, and take a quick photo—only for the image to come out looking flat, washed out, or cluttered.
Cameras do not view the world the way human eyes do. A lens compresses three-dimensional depth into a flat image, amplifies small blemishes on ground surfaces, and struggles with harsh sunlight. To make a landscape truly shine on screen, you need to focus on specific architectural features, textures, and lighting setups that translate well to digital media.
Here are five backyard details that consistently look amazing on camera, along with actionable ways to capture them.
Why Lenses View Outdoor Spaces Differently Than Human Eyes
A camera lens translates a dynamic 3D space into a static 2D frame, reducing subtle depth cues and exaggerating contrast between bright highlights and deep shadows.
When human eyes scan a backyard, our brains automatically adjust for dynamic range, filtering out minor mess while focusing on the overall ambiance. Cameras, however, capture every stray garden hose, cracked concrete pad, and uneven shadow line. Design choices that emphasize distinct focal points, bold textures, and clean physical boundaries yield the best photos and video clips.
1. Multi-Layered Landscape Lighting (The Drama Builder)
What type of outdoor lighting looks best on camera? Multi-layered lighting—combining overhead string lights, low-voltage pathway fixtures, and ground-level spotlighting on trees—looks best on camera because it creates rich visual depth and eliminates dark void spots during twilight shoots.
A single bright floodlight flattens your yard, washing out colors and creating blinding glare. Professional outdoor lighting design uses multiple warm-toned light sources placed at varying heights.
When photographing or filming your yard during the “golden hour” (just after sunset), layered lighting adds a warm, inviting glow. Overhead bistro lights frame the top of your shot, path lights guide the viewer’s eye through the frame, and subtle uplights highlight the structural silhouette of trees or stone walls.
2. High-Contrast, Ultra-Clean Ground Surfaces
Ground surfaces occupy up to 60% of any wide-angle photo or video shot. If your patio pavers are stained, or your concrete flooring is dull and chipped, the entire image loses its premium feel.
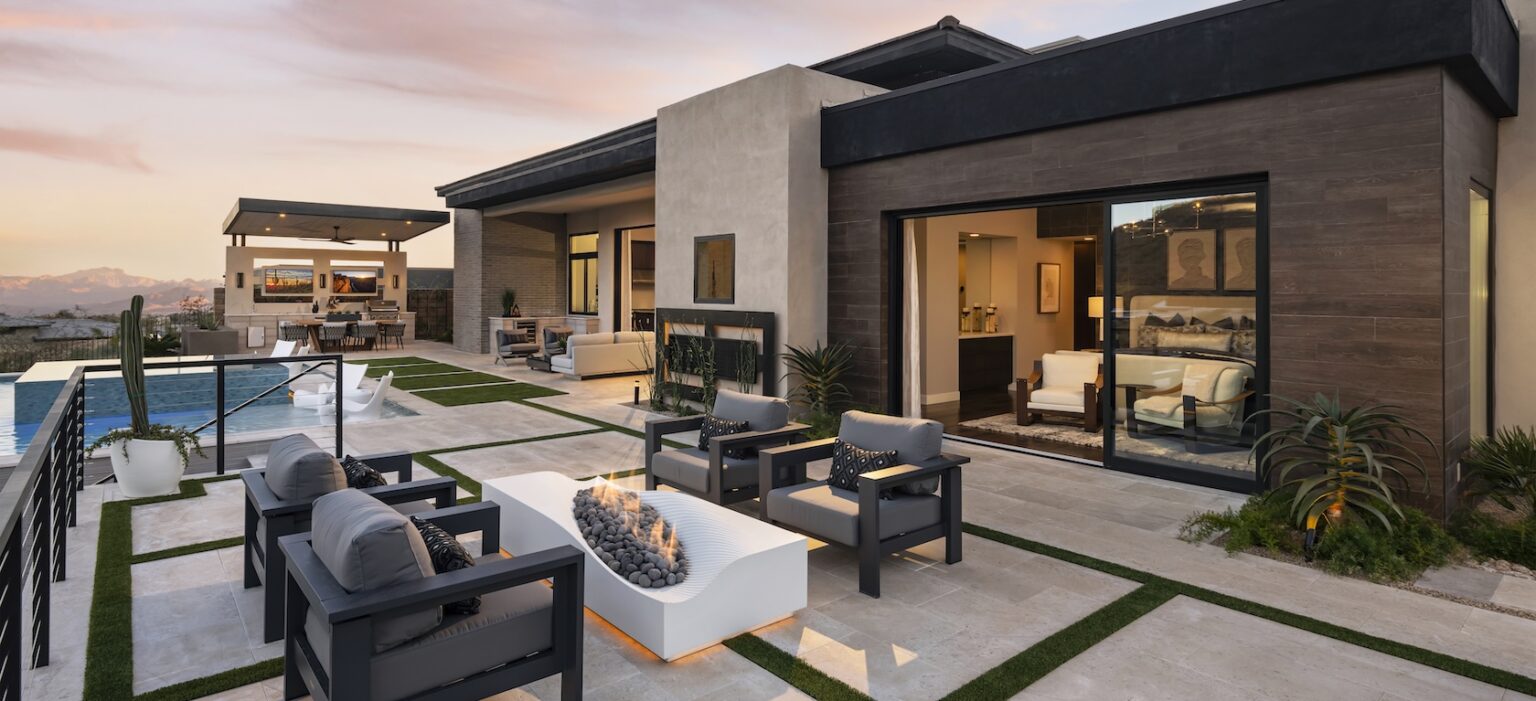
Cameras accentuate surface textures, meaning clean, high-contrast hardscape surface finishes immediately elevate a shot. Dark wood decking, patterned stone pavers, or high-gloss concrete coatings bounce ambient light toward the lens, making the space feel expansive and modern.
This contrast is especially noticeable in wide transition shots. Whether filming a tour that moves from an attached workshop out to the lawn or snapping photos across a covered patio, worn or stained concrete draws the eye down for the wrong reasons. Upgrading adjoining concrete surfaces with a sleek, high-durability finish—like a professional garage floor coating in Salt Lake City or a polished polyaspartic patio seal—creates a seamless, dust-free base. Clean floor surfaces reflect soft light upward, giving your entire outdoor living area a crisp, high-end look on camera.
3. Architectural Focal Points That Frame the Shot
Why do cameras need a central focal point in landscape photos? Cameras require a distinct focal point—such as a custom fire pit, a stone water fountain, or a wooden pergola—to anchor the composition, draw the viewer’s eye into the frame, and establish a clear sense of scale.
Without a central anchor, a wide shot of a open grass lawn feels empty and directionless. An architectural feature gives your photos a clear subject around which to build the image.
- Fire Features: Gas fire tables and stone pits provide warmth and natural orange light contrast against deep blue dusk skies.
- Pergolas and Arbors: Wooden or black aluminum structures act as natural picture frames, instantly adding vertical geometry to horizontal yards.
- Water Structures: Sheer descent waterfalls or fountain bowls add subtle movement to video clips and catch sunlight reflections in photos.
4. Textured Greenery with Depth-Creating Layers
A single wall of green hedges looks flat on camera. To make your landscaping pop on screen, layer your plants by height, foliage texture, and color contrast.
Combine wide-leaf tropicals or hostas with fine-textured ornamental grasses and dark evergreen shrubs behind them. This variation in leaf structure catches light differently, giving your background a rich, three-dimensional look.
To master basic backyard photography tips, use tall plants in the foreground of your camera lens. Shooting through leaves or hanging vines creates a soft, blurred frame (known as “bokeh”) that draws the viewer directly toward your main outdoor living zone.
5. Styled Seating Areas with Accent Colors
Unstyled outdoor furniture looks cold and uninviting on camera. Adding intentional pops of color gives the lens a visual anchor that guides the viewer’s eye through the space.
Start with neutral, weather-resistant base cushions (gray, beige, or charcoal), then introduce contrast using:
- Bold accent pillows (navy, terracotta, or mustard yellow).
- Textured outdoor throw blankets draped naturally over chair arms.
- A centered tabletop display, like a shallow bowl of succulents, a lantern, or wooden serving trays.
Keep the arrangement balanced but uncluttered. Too many small accessories make a photo look chaotic, while two or three deliberate styling pieces create a polished, editorial look.
The 10-Minute Camera-Ready Backyard Checklist
Before taking photos or filming video in your yard, run through this quick prep list to eliminate common visual distractions:
- [ ] Hide Disagreeable Objects: Roll up garden hoses, tuck away trash cans, and hide dog toys out of the camera’s sightline.
- [ ] Wipe Down Hard Surfaces: Hose off dust from patio tiles, and wipe down outdoor tabletops to remove pollen streaks.
- [ ] Tidy Up Plants: Trim dead leaves off foreground plants and rake stray leaves off pathways.
- [ ] Straighten Furniture: Align chair angles, fluff outdoor cushions, and center tabletop accents.
- [ ] Crank the Fire/Water: Turn on water features or light fire tables five minutes before shooting to establish atmospheric movement.
Common Photography Mistakes Homeowners Make
Even beautiful backyards look dull if captured incorrectly. Avoid these three common photo errors:
- Shooting at Midday Direct Sun: Harsh 12:00 PM sunlight creates deep, black shadows under furniture and washes out colors. Always shoot during the early morning or golden hour before sunset.
- Standing Straight Up for Every Shot: Photographing everything from adult eye-level results in boring perspective angles. Lower your camera to waist height to make your yard look larger and more immersive.
- Leaving the Lens Dirty: Outdoor environments are full of dust, finger smudges, and moisture. Always wipe your smartphone or camera lens with a microfiber cloth before shooting.
Frequently Asked Questions
What camera height works best for shooting backyard tours?
Holding the camera at chest or waist level creates a grounded, natural perspective. It keeps vertical architectural lines straight and emphasizes the depth of the lawn and patio flooring better than shooting from high eye-level.
How can I make a small backyard look larger in photos?
Use a wide-angle lens (0.5x on most modern smartphones), shoot from a low corner angle looking diagonally across the yard, and ensure the pathway or lawn is clear of clutter to create an unobstructed sightline.
Conclusion
Making a backyard look incredible on camera isn’t about spending tens of thousands of dollars on complete landscape overhauls. It comes down to understanding how light, texture, and contrast interact with a lens. By layering warm lighting, keeping ground surfaces clean and sealed, adding a bold focal point, and styling your living zones with intentional color, you transform a standard yard into a visual sanctuary that stands out on any screen.