

You’ve just upgraded your TV, excited to enjoy cinematic sound through your trusty stereo receiver or soundbar—only to discover there’s no way to get audio from your television to your older audio equipment. The TV outputs sound through HDMI ARC, but your amplifier only accepts optical or analog connections. This frustrating mismatch is one of the most common home theater audio problems, and it’s exactly where an ARC audio extractor becomes invaluable. ARC, or Audio Return Channel, allows your TV to send audio back through an HDMI cable, but not every audio system can receive that signal directly. An ARC audio extractor solves this by pulling the audio from the HDMI ARC signal and converting it into formats your existing equipment can handle, such as optical, coaxial, or RCA outputs. This guide will walk you through selecting the right ARC audio extractor for your specific setup, covering everything from compatibility requirements and audio format support to installation best practices. Whether you’re working with a legacy surround sound system or simply need cleaner audio separation, the sections ahead will equip you with the knowledge to make a confident, informed decision.
What is an ARC Audio Extractor and Why It’s Essential for Home Theaters
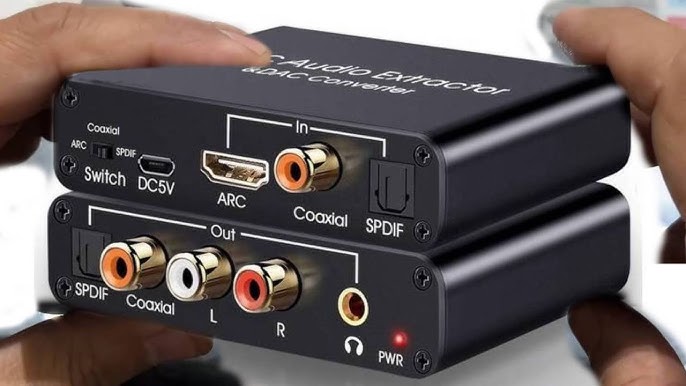
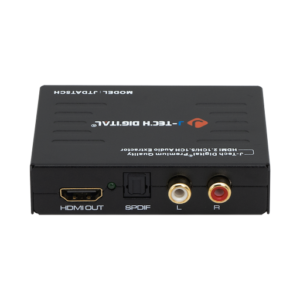
An ARC audio extractor is a compact device that intercepts the audio signal traveling through an HDMI ARC connection and converts it into alternative output formats—typically optical (TOSLINK), coaxial digital, or analog RCA stereo. Think of it as a translator sitting between your television and your audio equipment, ensuring they can communicate despite speaking different “languages.” The most common scenario requiring this device involves connecting a modern smart TV to a legacy stereo receiver or amplifier that lacks HDMI inputs entirely. It’s also useful when you want to feed audio simultaneously to multiple destinations, such as a powered subwoofer and a pair of bookshelf speakers running through separate amplification. You may encounter related terms during your research, including HDMI audio extractor, digital audio converter, or audio de-embedder—these describe similar or overlapping functions depending on the specific product design. For home theater owners, the core benefit is straightforward: an ARC audio extractor preserves your investment in quality audio equipment by bridging the gap between new video sources and existing sound systems, delivering clean, properly decoded audio without requiring expensive receiver upgrades or complicated workarounds.
Key Factors to Consider When Choosing Your ARC Audio Extractor
Selecting the right ARC audio extractor requires evaluating several critical factors that directly influence whether the device will work seamlessly within your home theater setup. Device compatibility sits at the top of this list—your extractor must work with your specific television’s ARC implementation and your audio system’s input capabilities. Not all TVs handle ARC identically, and some extractors struggle with certain brands or HDMI chipsets. Audio format support is equally important: if your system processes Dolby Digital 5.1 surround sound, the extractor must pass through that format without downmixing it to stereo. Build quality matters more than many buyers realize, as cheaply constructed units often introduce signal degradation, ground loop hum, or intermittent handshake failures that disrupt your listening experience. Among essential home theater accessories, the audio extractor is one where cutting corners on quality creates the most noticeable problems. Consider output flexibility as well—units offering both optical and analog RCA outputs simultaneously give you more routing options as your system evolves.
Compatibility Checks for Your Setup
Before purchasing, work through this verification process: confirm your TV’s HDMI port is labeled ARC (usually HDMI 1 or 2), check whether your TV supports standard ARC or enhanced ARC (eARC), identify the exact input types your amplifier or speakers require, and verify the HDMI version your television uses for its ARC output. Cross-reference these details against the extractor’s specifications to ensure a proper match between all components in your signal chain.
Ensuring Compatibility: A Step-by-Step Guide for Home Theater Owners
Getting compatibility right before you order saves the headache of returns and troubleshooting dead-end connections. Start by physically inspecting your TV’s HDMI ports—look for the small “ARC” label printed beneath or beside the connector. If your television was manufactured after 2019, check the settings menu or manual to determine whether it supports eARC, which carries higher-bandwidth audio formats like Dolby TrueHD and DTS-HD Master Audio. Standard ARC is limited to compressed formats up to Dolby Digital 5.1, so knowing which version your TV implements tells you exactly what audio quality the extractor needs to handle.
Next, examine your audio equipment’s available inputs. Count the optical, coaxial, and RCA connections, and note which are already occupied by other sources. This determines whether you need an extractor with a specific output type or one offering multiple simultaneous outputs. Pay attention to impedance matching if you’re feeding the analog output directly into powered monitors—some extractors produce line-level signals that may overdrive sensitive inputs.
EDID management is a factor many buyers overlook. EDID (Extended Display Identification Data) tells your TV what audio formats the connected device supports. Some extractors allow manual EDID configuration through DIP switches or buttons, letting you force the TV to output a specific format rather than defaulting to basic stereo. This is particularly useful when your TV incorrectly identifies the extractor’s capabilities. Check whether the extractor offers two-channel PCM, 5.1 pass-through, or auto-detect EDID modes.
Finally, verify firmware update availability. Manufacturers occasionally release updates that resolve handshake issues with specific TV brands—Samsung, LG, and Sony each implement ARC slightly differently at the chipset level. An extractor with USB firmware update capability gives you a path to fix compatibility problems that might emerge after a TV software update changes how the ARC port behaves. Before purchasing, search the manufacturer’s support page for recent firmware notes and confirm they actively maintain the product.
Top Features for Superior Audio Quality and Separation
Beyond basic compatibility, the features built into your ARC audio extractor determine whether you’ll enjoy pristine sound or settle for compromised audio that undermines your entire system. High-resolution audio support should be your first consideration—extractors capable of handling 192kHz/24-bit PCM audio deliver noticeably richer stereo reproduction compared to units capped at 48kHz. If your system processes surround sound, confirm the extractor passes Dolby Digital 5.1 and DTS without transcoding, as any unnecessary conversion introduces artifacts and strips detail from the original signal.
Latency performance separates professional-grade extractors from budget options. A quality digital audio converter within the extractor should process signals with less than 10 milliseconds of delay—anything higher creates visible lip-sync drift that becomes distracting during dialogue-heavy content. Look for units that specify their processing latency in documentation rather than those that omit this specification entirely.
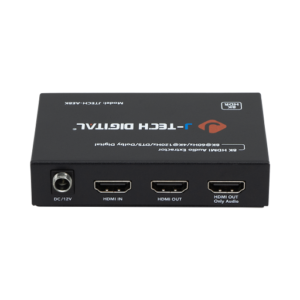
Noise reduction engineering matters particularly for analog RCA outputs. Well-designed extractors incorporate galvanic isolation or ground-lift circuitry that eliminates the buzzing and humming caused by ground loops between your TV and amplifier. This audio separation technology keeps the signal path clean regardless of how many devices share your power circuit. Multiple simultaneous outputs—optical and RCA active at the same time—allow you to route decoded surround to one system while sending stereo to zone two speakers without additional splitters. Manufacturers specializing in AV signal processing, such as J-Tech Digital Inc, often incorporate these isolation features and EDID management tools into their extractor designs, reflecting the kind of engineering focus that dedicated AV equipment companies bring to the category.
When evaluating products, prioritize units carrying HDMI licensing certification, which ensures proper protocol compliance. Cross-reference user reviews specifically mentioning your TV brand, and favor manufacturers who publish detailed specifications over those relying solely on marketing language. Community forums dedicated to home theater setups often maintain compatibility lists that prove more reliable than manufacturer claims alone.
How to Choose and Install the Best ARC Audio Extractor: Practical Solutions
Start your selection process by documenting your exact requirements: write down your TV model and its ARC capabilities, your audio equipment’s input types, and the audio formats you need preserved in the signal chain. With this information, narrow your options to extractors that match all three criteria simultaneously rather than compromising on any single factor. Compare your shortlisted products by examining their EDID management options, output configurations, and whether they carry HDMI licensing certification. Read user reviews filtered specifically for your TV brand, since real-world performance often differs from spec sheets.
Once you’ve made your purchase, installation follows a straightforward sequence. Connect a high-speed HDMI cable from your TV’s ARC-labeled port to the extractor’s HDMI input. Run your preferred audio cable—optical, coaxial, or RCA—from the extractor’s output to your amplifier or speakers. Power the extractor using its included adapter, then navigate to your TV’s sound settings and enable HDMI ARC output, setting the audio format to match your system’s capabilities rather than leaving it on auto-detect. If you hear no sound initially, toggle the EDID switch on the extractor to force a specific format, then power-cycle both the TV and the extractor to reset the handshake. For persistent lip-sync issues, check your TV’s audio delay settings and adjust in five-millisecond increments until dialogue aligns with on-screen movement.
Bridging Modern TVs and Legacy Audio Equipment with the Right Extractor
Choosing the right ARC audio extractor comes down to two fundamental priorities: ensuring full compatibility with your existing equipment and preserving the audio quality your system is capable of delivering. By verifying your TV’s ARC or eARC capabilities, matching output types to your amplifier’s inputs, and confirming support for the surround sound formats you rely on, you eliminate the most common sources of frustration before they arise. Features like EDID management, low-latency processing, and galvanic isolation distinguish extractors that perform reliably from those that introduce new problems into your signal chain. Take the time to document your setup’s specific requirements, cross-reference them against product specifications, and consult community feedback from users with similar configurations. A well-chosen ARC audio extractor protects your investment in quality speakers and amplification while unlocking the full potential of your modern TV’s audio output. Apply the steps outlined in this guide, and you’ll bridge the gap between new and legacy equipment without compromise—enjoying the immersive home theater sound your system was designed to deliver.