
Sanding drywall can look simple until you have a large wall, several joints, or a ceiling to finish. Hand sanding may work for small repairs, but larger projects require more control and less physical strain. The right sheetrock sander can make it easier to smooth joint compound, remove uneven areas, and prepare surfaces for primer or paint. The key is choosing a tool that matches the size of the job, the type of surface, and the way you work.
Not every drywall sander has the same design. Some are compact and easy to control, while others are built with long handles for walls and ceilings. Motor power, sanding speed, pad size, dust collection, weight, and handle design all affect how the tool performs. Understanding these features before buying can help you avoid paying for features you will rarely use or choosing a tool that is difficult to handle.
Start With the Type of Work You Actually Do
The first thing to consider is the kind of drywall work you expect to handle. A homeowner repairing a few damaged areas does not need the same equipment as a contractor sanding several rooms each week. Small repairs may only require a lightweight tool, while full drywall installations benefit from a machine designed for extended use.
Think about the surfaces you will sand as well. Walls are generally easier to reach than ceilings, especially when the tool has a short handle. If you regularly work above shoulder height, an adjustable or extended handle can make a major difference. Matching the tool to the job helps you work more comfortably and maintain better control.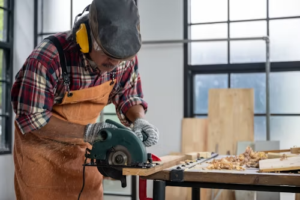
Motor Power Can Affect Your Work Speed
Motor power determines how effectively the sander can maintain movement against the drywall surface. A stronger motor can be useful when sanding larger areas or working with heavier layers of joint compound. However, higher power does not automatically mean a better tool for every project.
Control matters just as much as power. A machine that removes material aggressively can make it easier to damage the paper surface if you are not careful. For finishing work, consistent sanding and good control are often more useful than simply choosing the highest wattage available.
Variable Speed Gives You More Control
Different drywall surfaces may require different sanding speeds. A rough area with excess compound can need more aggressive sanding, while a nearly finished joint may require a lighter touch. Variable speed allows you to adjust the tool instead of using the same setting for every surface.
Lower speeds can also help when you are working near corners or trying to avoid removing too much material. Higher settings may be useful for larger flat areas where more material needs to be removed. If your projects vary from repairs to complete rooms, adjustable speed is a practical feature to have.
Consider the Sanding Head and Pad Size
The size of the sanding pad affects how much surface the tool can cover with each pass. A larger pad can make broad walls faster to sand because it covers more area. A smaller head may provide better control around tighter spaces and detailed sections.
The sanding head should also move smoothly across the surface. Some designs allow the head to follow small changes in the wall or ceiling angle, which can help maintain more consistent contact. Before choosing a tool, consider whether your projects involve mostly open surfaces or a mixture of large areas, corners, and smaller repairs.
Choose a Handle That Matches Your Reach
Handle design is one of the easiest features to overlook. A short handle can work well when sanding sections at chest height, but reaching ceilings with it can force you to stretch or use a ladder. That can make a long sanding session more tiring.
For larger walls and ceilings, a drywall sander with telescopic handle can offer more flexibility. The adjustable length lets you change the working position according to the surface. You may be able to reach higher areas while keeping your feet on the floor, although the exact reach depends on the tool and the user’s height.
Weight Matters More Than You Might Expect
A drywall sander can become tiring when held for long periods, especially when sanding ceilings. Even a machine that feels light for a few minutes can become uncomfortable during a larger project. Weight should therefore be considered alongside motor power and handle length.
Balance is also important. A tool with good weight distribution can feel easier to guide than one that is technically lighter but places more weight toward the sanding head. If possible, consider how the machine will feel when held above your head, not just how much it weighs on paper.
Dust Collection Should Be Part of the Decision
Drywall dust is extremely fine and can spread throughout a room during sanding. It can settle on floors, furniture, tools, and other surfaces. Excess dust can also make it harder to see the surface clearly while working.
Many powered drywall sanders can connect to a vacuum or use a dust collection system. This can reduce the amount of dust released into the surrounding area, although no system captures every particle. A compatible vacuum, proper filters, and a secure connection can all affect how well the setup performs.
Good dust control also makes cleanup easier. Instead of allowing large amounts of dust to settle around the room, the collection system can capture much of it closer to the sanding point. You should still use suitable respiratory protection and follow safe work practices when sanding drywall.
Think About Sandpaper and Grit Options
The abrasive you use has a direct effect on the finish. Coarser grit can remove material faster, but it may leave more visible scratches. Finer grit is generally better suited to smoothing a surface that is already close to finished.
Your sheetrock sander should support sanding discs or pads that are easy to find and suitable for your work. Check the pad diameter and attachment method before buying replacement abrasives. Having several grit options available lets you move from material removal to surface finishing without relying on one abrasive for every stage.
Look at the Tool’s Range of Adjustment
Adjustability becomes especially useful when a single tool needs to handle different working positions. An adjustable handle can help with high walls and ceilings, while an adjustable sanding head can make it easier to keep the pad against the surface.
Some projects also require access to areas where a long setup becomes inconvenient. A tool that folds, shortens, or separates into sections can be easier to store and transport. Think about what happens after the job is finished, not just how the tool performs while sanding.
Check Ergonomics Before Choosing a Model
Sanding requires repetitive movement, so comfort should be treated as a functional feature. Look for a handle that gives you a secure grip without forcing your wrist into an awkward position. Controls should also be easy to reach while you are working.
A comfortable machine can help you maintain consistent pressure and movement. That matters because pressing too hard can remove too much compound, while inconsistent pressure can leave uneven areas. The tool should assist your technique rather than make it harder to control the sanding head.
Match the Tool to Walls and Ceilings
Walls and ceilings create different demands. A wall can often be sanded while the tool is held around waist or chest level, depending on the work area. A ceiling requires the tool to be supported overhead, which makes weight, handle length, and balance more important.
If you only work on occasional wall repairs, a simpler design may be enough. If ceilings are a regular part of your projects, prioritize reach and overhead comfort. A longer handle can reduce the need for ladders in some situations, but it can also increase leverage and make the tool feel different in your hands.
Avoid Choosing Based on One Feature
It is easy to focus on motor wattage, price, or pad size when comparing sanders. Those specifications matter, but none tells you how suitable the entire tool will be for your project. A high-powered machine with poor balance may be harder to use than a slightly less powerful model with better control.
Consider the complete setup instead. Look at power, speed adjustment, sanding area, dust collection, handle design, weight, replacement abrasives, and storage. The right combination depends on how often you work, what surfaces you sand, and how much control you need.
Common Mistakes to Avoid
One common mistake is buying a tool that is too large for small repair work. A larger machine can be useful for broad surfaces but may feel awkward around small patches or narrow sections. Another mistake is ignoring dust collection until after the tool has been purchased.
It is also easy to underestimate the importance of reach. If you frequently sand ceilings, a short handle can quickly become uncomfortable. Finally, avoid assuming that maximum power or speed is always better. Drywall finishing rewards control, even pressure, and gradual material removal.
A Practical Way to Compare Your Options
Before making a purchase, write down the surfaces and tasks you handle most often. Include wall repairs, full-room sanding, ceiling work, corners, and any other common jobs. Then compare tools based on those requirements rather than choosing the model with the longest feature list.
For frequent drywall work, prioritize durability, dust management, comfortable handling, adjustable speed, and a useful reach. For occasional home projects, ease of storage, simple controls, and reasonable weight may matter more. Your ideal tool is the one that fits your actual workload rather than the one with the most specifications.
When a Telescopic Handle Is Worth Having
A telescopic handle is particularly useful when your work involves high walls or ceilings. Instead of keeping your arms raised for every pass, you can extend the handle to reach a greater height from a more comfortable position. This can also reduce the need to reposition a ladder as often.
However, longer does not always mean better. An extended handle can change the balance of the machine and may require more effort to control. It is useful to have adjustment options so you can shorten the handle when working on lower surfaces and extend it only when extra reach is needed.
Keep Maintenance in Mind
A drywall sander needs regular cleaning because fine dust can collect around moving parts, ventilation openings, connections, and sanding components. Follow the manufacturer’s cleaning instructions and avoid allowing dust to build up inside areas that require airflow.
Check sanding discs and pads regularly for wear. A worn abrasive may produce poor results and can encourage you to apply more pressure than necessary. Inspect the power cord, vacuum connection, and moving parts before longer jobs, especially if the machine is used frequently.
The Right Choice Depends on Your Working Style
There is no single drywall sander that suits every user. Someone handling occasional repairs may prefer a lightweight and compact tool, while a professional working on several rooms may need stronger performance and better dust management. Ceiling work can shift the priority toward handle length, balance, and overhead comfort.
Take time to compare the features that directly affect your work. Motor power, variable speed, pad size, dust collection, handle adjustment, weight, ergonomics, and abrasive compatibility all have a role. When these features match your projects, sanding becomes easier to control and the finished surface is more consistent.
Frequently Asked Questions
What is a sheetrock sander used for?
A sheetrock sander is designed to smooth drywall joint compound, remove minor surface imperfections, and prepare walls or ceilings for finishing. Powered models can cover larger areas more efficiently than manual sanding. They are especially useful after taping and applying joint compound.
Can a drywall sander be used on ceilings?
Yes, many drywall sanders are designed for both walls and ceilings. For ceiling work, pay close attention to the tool’s weight, balance, handle length, and sanding head movement. A longer adjustable handle can make high surfaces easier to reach.
Is a drywall sander with a telescopic handle better?
It can be a better choice if you regularly work on high walls or ceilings. The adjustable reach can reduce stretching and may reduce the need to reposition a ladder. If most of your work involves small repairs at a comfortable height, the extra handle length may not be necessary.
What grit should I use for sanding drywall?
The appropriate grit depends on the stage of the job. A coarser abrasive can help remove excess joint compound, while a finer grit is better for smoothing a nearly finished surface. Avoid using excessive pressure, particularly with coarse abrasives.
Do drywall sanders collect all the dust?
No dust collection system captures every particle. A compatible vacuum or collection bag can significantly reduce airborne and surface dust, but some particles will still escape. Good ventilation, appropriate respiratory protection, and proper cleanup remain important.
How do I know which drywall sander is right for me?
Start with your typical project size and working positions. Consider how often you sand, whether you work on ceilings, how much reach you need, and whether dust collection is important for your workspace. Then compare power, speed control, weight, sanding pad size, handle adjustment, and available abrasives to find a tool that fits those needs.